Showing posts with label In the Sewing Room. Show all posts

Sunday, April 14, 2013

Tote Bags Galore

 Have I mentioned I enjoy making bags? Purses, handbags, pouches, messenger bags, tote bags, if it can hold stuff, I love making it.
My last post was about the custom handbag I made as a result of a Craftsy class I participated in called Design Your Own Handbag instructed by Brett Bara.
I can't say enough great things about the Craftsy platform and classes.
Once you purchase the course, its yours forever. You can go back at anytime to watch all or just parts of a class. You can post your questions, comments, etc. in the class, and the instructor replies, and so do the other participants. 
Craftsy also has classes they offer for free! Such a great deal. To prep for the Design Your Own Handbag class, I signed up for a free Craftsy class called Bag Making Basics: Reversible Tote and Zipper Pouch. This course is taught by Kristen Link and is so easy to follow that I went a little crazy with the reversible tote bags. As can be seen by the row of pictures on the left and right.
This was a wonderful way to use up a bunch of fabric pieces that I have. The bags don't take much in the way of yardage, so I just put colors and patterns together in whatever way felt fun.
The bags are reversible and machine washable. That may just be the best part.


Sunday, March 3, 2013

Custom Designed Handbag

Craftsy is the greatest! Participating in their online course platform is so convenient and fun. Once you purchase the class, it is yours forever and you can go back to it again and again. This is the 3rd class from Craftsy that I have participated in, and I plan to participate in many more.
The class is called Design Your Own Handbag and the instructor is Brett Bara.
I decided to purchase the class because I love purses, and I enjoy making my own. 
This handbag is the best I have ever made. I am very proud of how it turned out. The hardware makes it look professionally made. 
My inspiration was the beautiful home decor fabric I found the the clearance bin at Hobby Lobby. I found the faux leather in the same bin.
The actual sewing of the bag was simple and only took about 2 hours. The hardware is a different story. 
The hardware was ordered from Pacific Trimming and was by far the most expensive part of the project. It took most of an afternoon to install the hardware. 
The time invested was well worth it!

Monday, December 31, 2012

Replacing a Back Pocket on a Pair of Levi's

My husband only wears Levi's. When I say he only wears Levi's I mean that he only wears 501, button-fly jeans. No other jeans will do.
In 1988, when we first met, that is all he wore, and to this day, it's all he still wears.
He has graduated to wearing other colors, not just blue, but they have to be Levi's 501s.
Being a frugal guy, he has a difficult time stomaching the purchase of a pair of jeans for $50. Consequently, he buys them on sale, or better yet, at Goodwill or Savers, when he can find decent ones that fit.
My husband will wear a pair of 501s for years and years and years. The new ones are for work, and as they wear, they are cycled and worn for home and outdoor activities.
It probably goes without saying that I have become pretty fair at repairing Levi's 501s so that he can eek a few more years out of them.
One of the areas that wears out rather quickly, is the back right (wallet) pocket.
Here is a simple method that I use to fix this.
Note: This method works for us because of the large number of old Levi's 501s my husband has.
Materials Needed:
Jeans the same color as the ones to be repaired
Seam ripper
Pins
Jean needle
Sewing Machine
Thread that matches the stitching on the jeans

Step 1: Carefully remove the worn out pocket with a seam ripper. Don't forget to save the red Levi's tag!
Step 2: Choose an old, done-in pair of Levi's that are the same color, and carefully remove one of the back pockets. (One that's in better shape)
Step 3: Remove any loose threads that are left on the pants and pocket from the seam ripper.
Step 4: Pin the "new" pocket in place, by matching the original sewing lines on the back of the pants. Don't forget the red tag!
 Step 5: Machine stitch (with a jean needle) the pocket along the original top stitching lines on the pocket. Use thread that matches the top stitching on the jeans. Be sure to stitch over both lines of stitching. Satin stitch at the top corners to make the pocket secure.
Step 6: The pocket is replaced. Can you tell it's a different pocket?
I think this repair could work with any type of jeans.


Sunday, November 4, 2012

Edwardian Era Motoring Outfits

I love wearing costumes! Costumes allow you to be anything you can imagine, if only for just a while. Each year our dear friends hold a Halloween party, and everyone who attends tries to create a costume that others will talk about.
I have made many costumes for these parties over the past 20 years. We have been the Munsters, a 1700's Scottish couple, Greek gods, Rhett and Scarlett, Vikings, and many others. 
This year, in honor of my husband's love of old automobiles, I made Edwardian Era driving outfits.
I am very proud of how they turned out. They are very authentic and I can just picture us motoring down a dirt road in a "Tin Lizzy".
It took me 4 weeks, 4 denim needles, 12 yards of cotton duck fabric, and 10 yards of trim to create these.
I also spilled blood for these, as sewing buttons on this heavy weight fabric caused me to jab my fingers many times as I worked on these. 
The hats were my first attempt at head wear, and 
they turned out pretty well. The flowers on the woman's hat came from Goodwill.
Anyway, here are some detail photos of the outfits. I hope you enjoy.


Sunday, January 29, 2012

Pillow Project

I have been slowly working my way through an online course called Sewing Studio. The course is on Craftsy and is taught by Diana Rupp. It is a sewing basics class. It covers sewing home decor, clothing, etc. I decided to take it to refine and hone my skills. It has been fun and interesting.
The first project in the course is a French seamed pillow. I decided to try my hand at making them. The fabric I used came from a second-hand store in my hometown. I wanted to add a bit of color to my very brown living room furniture.
Here is the finished project.
I am very pleased with the result. I think they look beautiful! 
By following the instructor's directions and tips the resulting pillows turned out very professional looking.
Pillows like this would cost at least $15 a piece in a store.
They give the living room exactly the right pop of color I was looking for.

Saturday, December 31, 2011

Everyone Needs an Apron

Finally, I can post my Christmas gift projects. The last ones were gifted yesterday at a wonderful lunch with my two dearest friends. So now the cat can be let out of the bag, so to speak.
This year I decided to make aprons. I have the philosophy that everyone needs an apron. I also have the philosophy of getting rid of the tons of bizarre fabric I have that I can't find any other use for. That fabric worked perfectly for aprons.
The stash of patterns in my sewing area yielded a pattern for aprons, but it wasn't quite what I pictured. After scouring the Internet for a pattern, and not finding exactly what I envisioned, I did what I should have done in the first place...I created my own pattern.
The apron I had in mind needed to be workable for both men and women, and above all, be simple in design and construction.
My cousin made an apron in home ec class over 30 years ago, that I somehow ended up with and still use. (remember home ec?)That old home ec apron was the closest to my vision, so it became the guide.
Old newspaper became the pattern paper and cutting and construction began. 
No pictures were taken during this process. (Too much concentration on the design to remember to get the camera).
Oven repair man in background
However, a photo was taken of each of the aprons created. The apron gallery is posted throughout this blog entry.
Overall, I am happy with the results. The apron that developed was a simple design and easy to make. The entire time spent on one apron from cutting through completion was about an hour.
The pattern is so simple that adding embellishment wouldn't take much effort. Maybe that will be my next project.

Saturday, April 23, 2011

Guitar Strap Bag

My son purchased a role of colorful woven strap fabric he liked so that he could make a new guitar strap out of it. Once he unrolled the strap fabric, he realized that it wasn't sturdy enough by itself to do the job. He decided to back it with some faux suede. After he finished the guitar strap, there was nearly a yard of the faux suede left.
I asked him if I could use the remainder and he agreed. I used my new sewing machine (Brother SQ9000) to put together a cross body bag. I took advantage of the decorative stitches available on this machine for the bag flap.
The lining fabric was left over from a roman shade I made for my kitchen. The lining has vining leaves, so I choose a decorative stitch to go with that. The results are pleasing. See for yourself...


Easter Bunnies

I made this bunch of bunnies using men's shirts and ties and some left over fabric scraps. I found the pattern and directions here: http://www.marthastewart.com/how-to/stuffed-bunny
They were so fun and easy to make that I actually made 6 of them. I gave 3 of them to some special little people in my life. The ones above are the ones I have left.
The yellow in the ears of the middle and right hand ones are from one of my husband's ties. It was from the '80s, so I used it without asking him first.
Lucky for me he was not angry when I fessed up. He acknowledged that he only wears ties to weddings and funerals.
I promptly retrieved 3 more ties from his closet.
I will post the projects from those in a later post.

Monday, April 4, 2011

More bags...

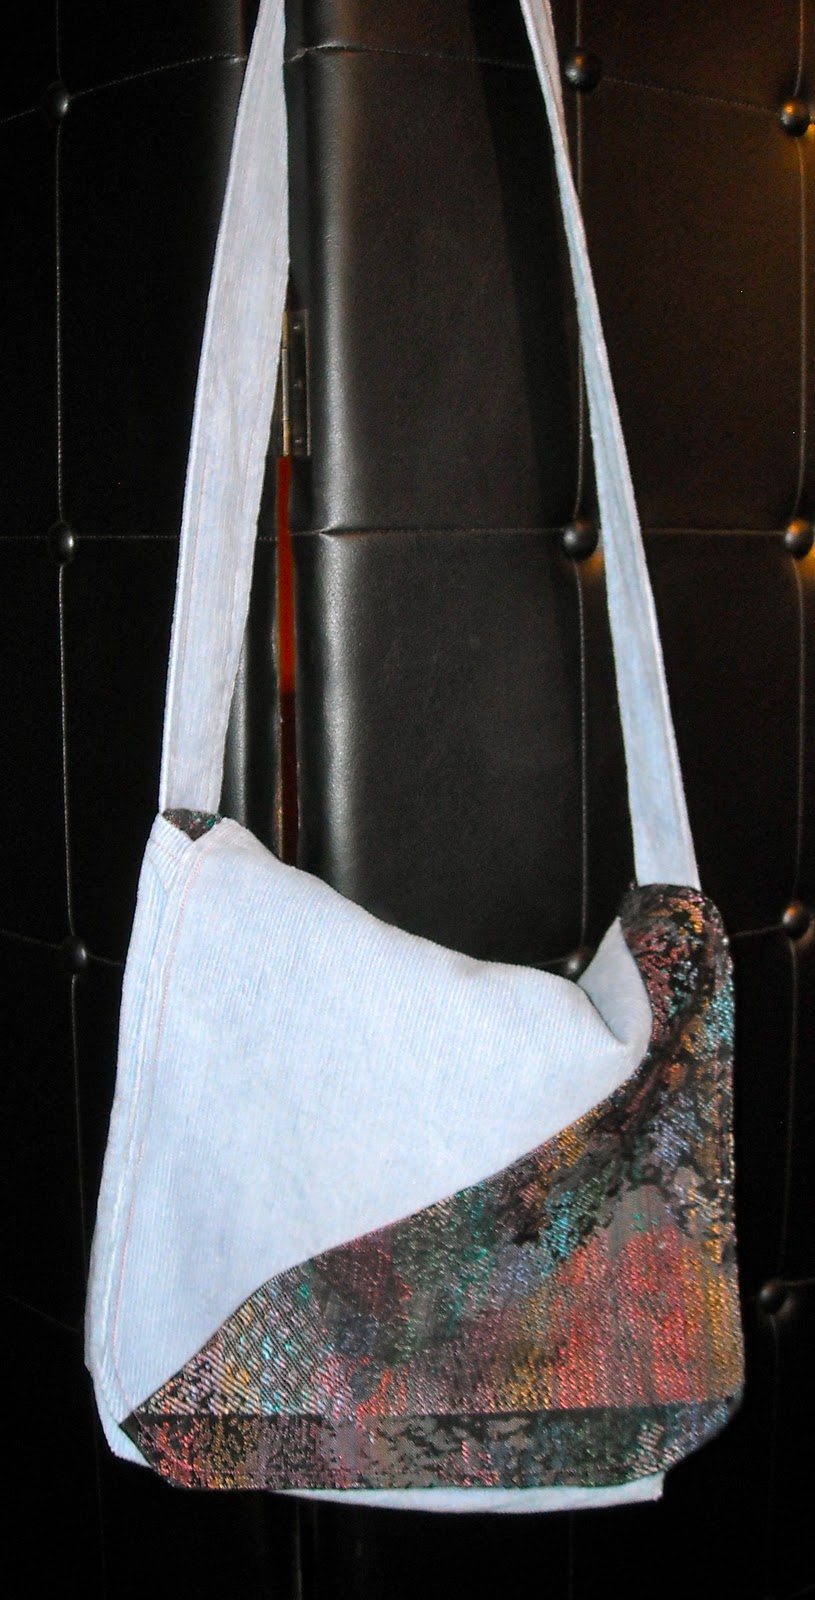
Last weekend I spent some time creating some messenger bags for a couple of my friends and my daughter. I made a large padded one (room for a Mac Book)  with a big wide handle. I love it!
I am supposed to give it to my daughter, but I just might have to keep it.  The fabric is some that my mom sent me. She bought it to make herself a jacket, which she obviously never did. I have used it on about 4 bags, and have used it up.
This is how I will rationalize it when I explain to my daughter that it is mine.
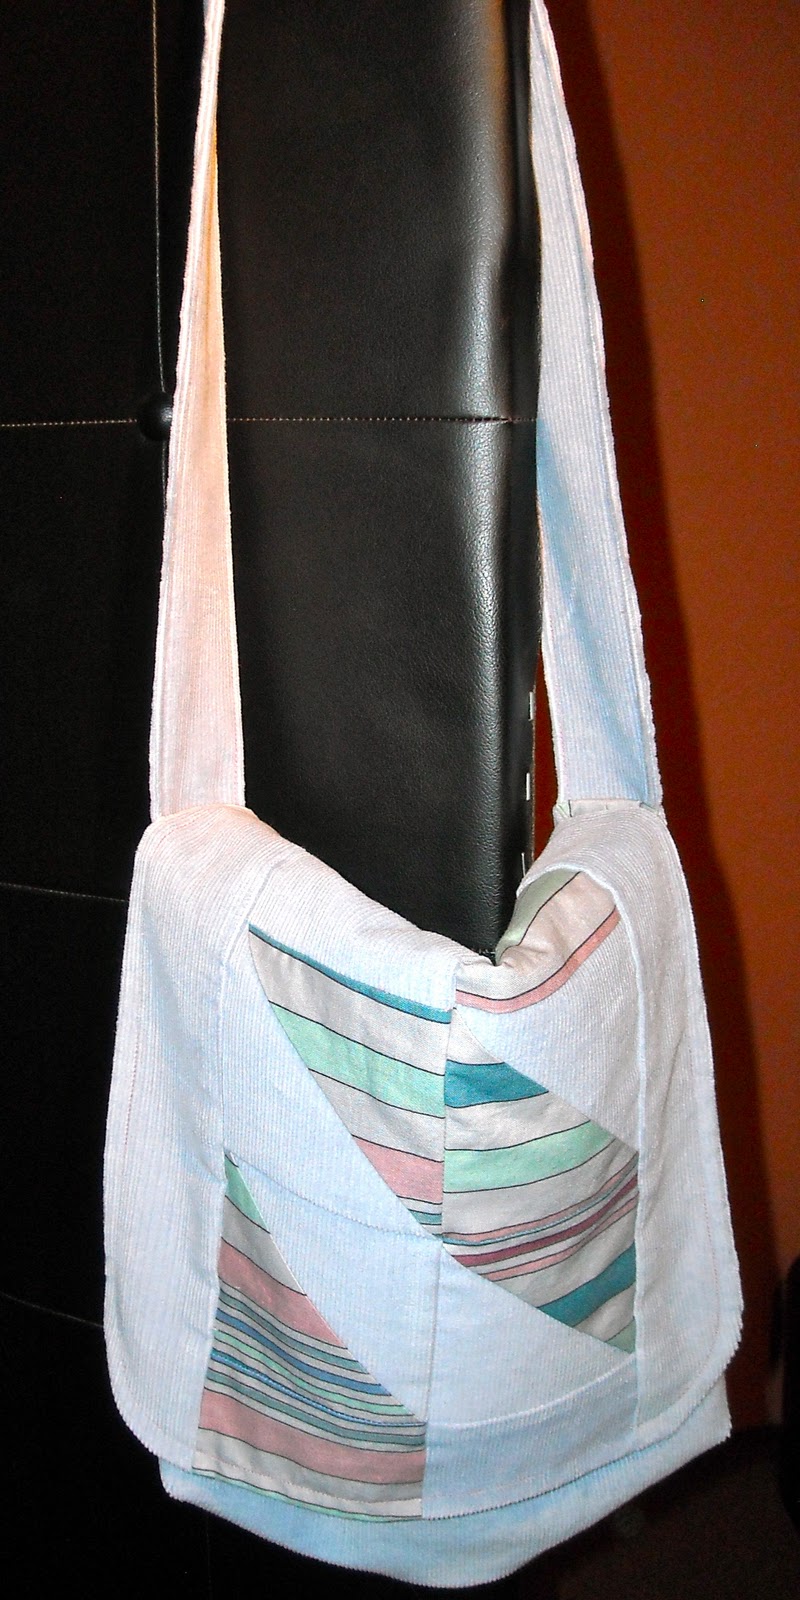
I made 2 other smaller bags and tried a bit of quilting on the flap. This is my first attempt at piecing.

I am fairly happy with the results. (Notice Mom's never-used jacket fabric)
The other fabric you see looks like washed-out denim in the photo, but it is actually a pale blue corduroy. The corduroy, I purchased at a tiny thrift store around the corner from my house. It was a huge piece of fabric for only $2. I have more left. It is perfect for these type of messenger bags.


This  one is really my pieced-a-resistance? (That doesn't seem right) Anyway, it is truly pieced like a quilt. Can you see the mismatched stripes?

Saturday, March 19, 2011

Puppy Pillow

This dog bed is made from fabric scraps I had in my stash. It is my first attempt at making a dog bed. I think is is pretty cute. We will see how my dogs like it.
The fabric choice is serendipitous, as the puppy pillow will be used in our bedroom and the floral fabric is the same used in the valance on our bedroom window and as a curtain that hides storage under my sink in the master bath.
The bed is approximately 17X21 inches, and about 2 inches thick. I used fiber fill to stuff it. It was some that I had left from another project. The pattern was one that I downloaded from the Internet years ago. The pattern said to enlarge 200% which I did, but it was still really too small. I had to improvise. I am pleased with the results. Especially since it is made from scraps I had around. No purchases necessary for this project.
I like it!

Messenger Bags

These are some pictures of the messenger bags I have been making for friends, family and myself. The bluejean one was made from a very old pair of my husband's Levi 501s. It was made for my daughter. She loves it. It is especially nice for her at college because it can be washed very easily. I found the pattern at this link: http://mmmcrafts.blogspot.com/2009/06/basic-messenger-bag.html
It is really simple and fun to make. I added an extra pocket inside just because I like a little more organization in my purses.